


ORORO Beginner Guide 2019

Hello and welcome! Now you’re part of the ORORO Squad. Ready to gear up? We know you want to begin using your heated gear right away. But first, you gotta know the steps to follow, right?
It’s easy peasy!
For those who just can’t wait, we’ve designed this easy and quick start-up guide so you can begin challenging the climate together with us.
1. Prepare. Charge batteries!

We all need to charge batteries for a day full of energy. In the same way, ORORO batteries need to get charged for some hours before facing any climate challenges. Please allow yours to fully charge before the first use. How to know if it’s fully charged? The lights on the battery will be on and will stop blinking.
Important: Only charge with the ORORO battery charger that comes in the packet.
2. Safety first: Take some precautions.

Precautions are always important. Please check out all the safety instructions included in your product’s User Manual.
Most importantly, make sure not to use on children, people with disabilities, or sensitive to heat. We also don’t recommend its use on people with implanted cardiovascular devices.
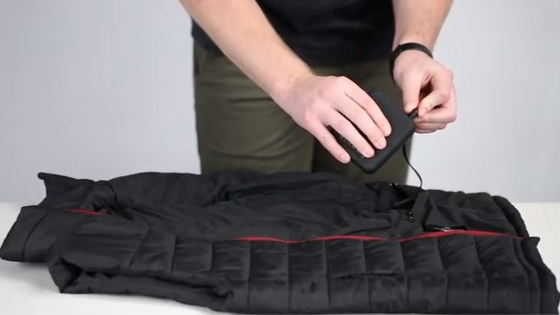
3. Batteries, to your places!
It’s time to load your gear with battery power. Here’s how:
- You’ll find a battery pocket on the inside of your heated gear.
- Inside this pocket, you’ll find a power cable. Insert it to the battery’s port.
- Once connected, place the battery inside the pocket and close the zipper.
- You're all set. Now, what you were waiting for!
4. Time to preheat: Power on!
It’s time to preheat your gear:
- Find the ORORO logo on your apparel. This is the power button.
- To turn on, press and hold the button for 3 seconds.

- You’ll notice that the LED light will turn on. It will be red and blinking. This means that your gear is on PRE-HEAT mode.
- It will stay in this mode for around 5 minutes.
- Once it has pre-heated it will automatically switch to Medium heat mode (white LED light).
5. Stay Toasty: Choose your desired heating level.
You can select between 3 different heating levels: High, Medium, and Low. To select, simply press the button until you find the color that matches your desired level:

The lower the heat setting, the more your battery will last.
- High: 2-3 hours
- Medium: 5-6 hours
- Low: 8-10 hours
6. Time to cool down
Press and hold the button for 3 seconds to turn off. The LED light will turn off.

7. Ask for a hand: Reach out!
Still got questions? We’re here to help you with any challenges you may encounter. Just reach out to us at support@ororowear.com.

You can also check our video guide here: ORORO Battery Quick Start Guide
Want to know why ORORO batteries are better? Find out here.